Model HQ
DocumentationExploring Chat in Model HQ
Once you complete the initial setup, you will be directed to the Main Menu.
This interface offers multiple functionalities; in this section, we will focus specifically on the Chat feature. The Chat feature allows users a fast way to start experimenting with chat models of various sizes, from Small (1-3 billion parameters), Medium (7-8 billion parameters) to Large (9 and above, up to 32 billion parameters).
Users are able to select which size model they would like to interact with going through Changing Chat Model in Model HQ.
1. Launching the Chat Interface
Click on the Chat button from the main menu to get started.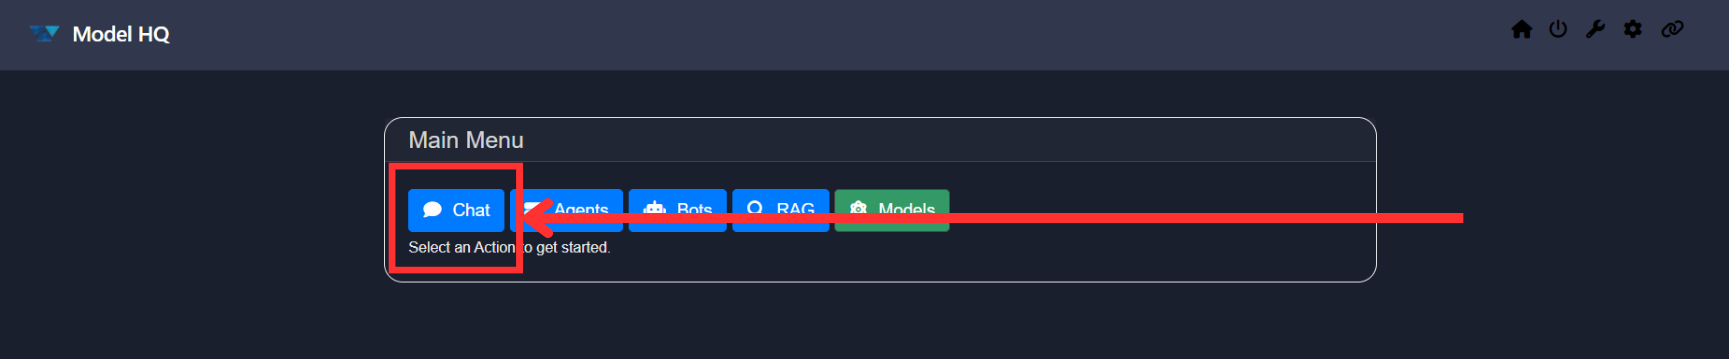
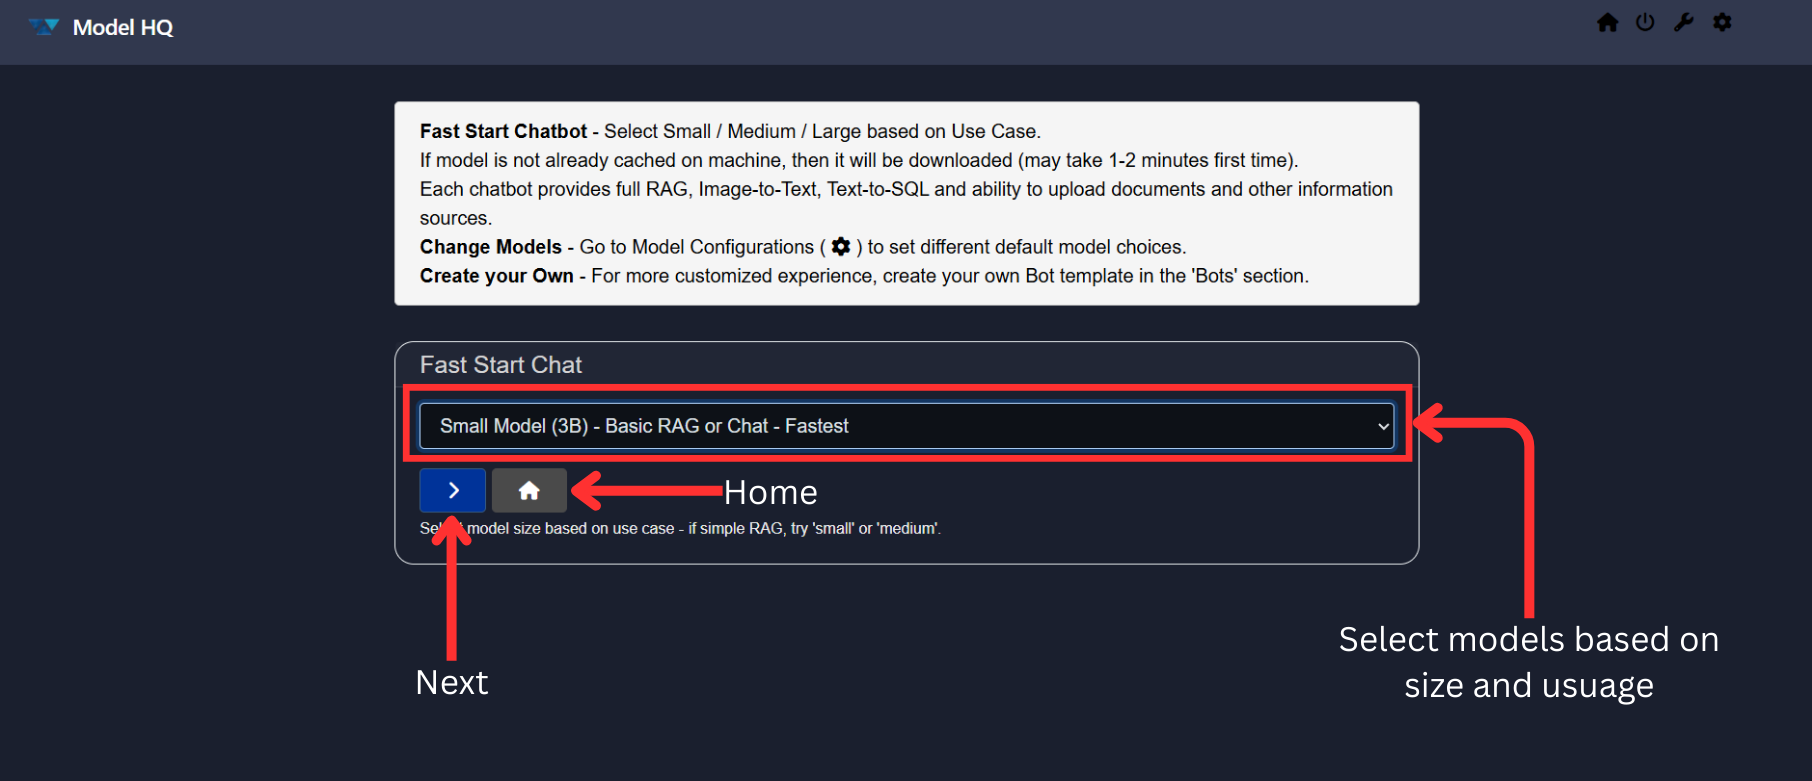
2. Selecting a Model
You will be prompted with a screen asking you to choose a model for Chat or Retrieval Augmented Generation (RAG).
Model HQ provides options based on performance, size, and speed — allowing you to select a model that fits your requirements.
Once you have selected a model, click the > button to proceed.
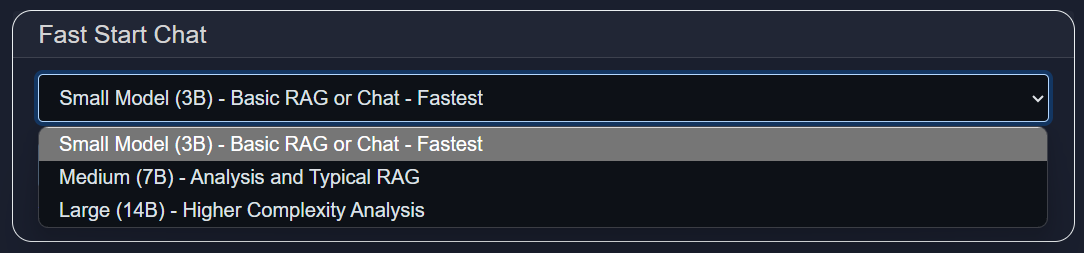
Available Model Options:
- Small Model:
~1-3 billion parameters — Fastest response time, suitable for basic chat. - Medium Model:
~7-8 billion parameters — Balanced performance, ideal for chat, data analysis and standard RAG tasks. - Large Model:
~9 up to 32 billion parameters — Most powerful chat, RAG and best for advanced and complex analytical workloads.
3. Downloading Models
For demonstration purposes, we are selecting the Small Model.
If no models have been downloaded previously (e.g., in the No Setup, Fast Setup, or Full Setup paths), the selected model will begin downloading automatically.
This process typically takes 2–7 minutes, depending on the model you selected and your internet speed.

Once the model download is complete, it will be automatically loaded (this typically takes less than a minute). After loading, you can begin interacting with the model through the Chat interface.
TIP
If you encounter an error while downloading the model, please refer to the Model Download Error Guide for troubleshooting steps and solutions.
4. Understanding the Chat Interface
Once your model is loaded, you will be taken to the Chat Interface.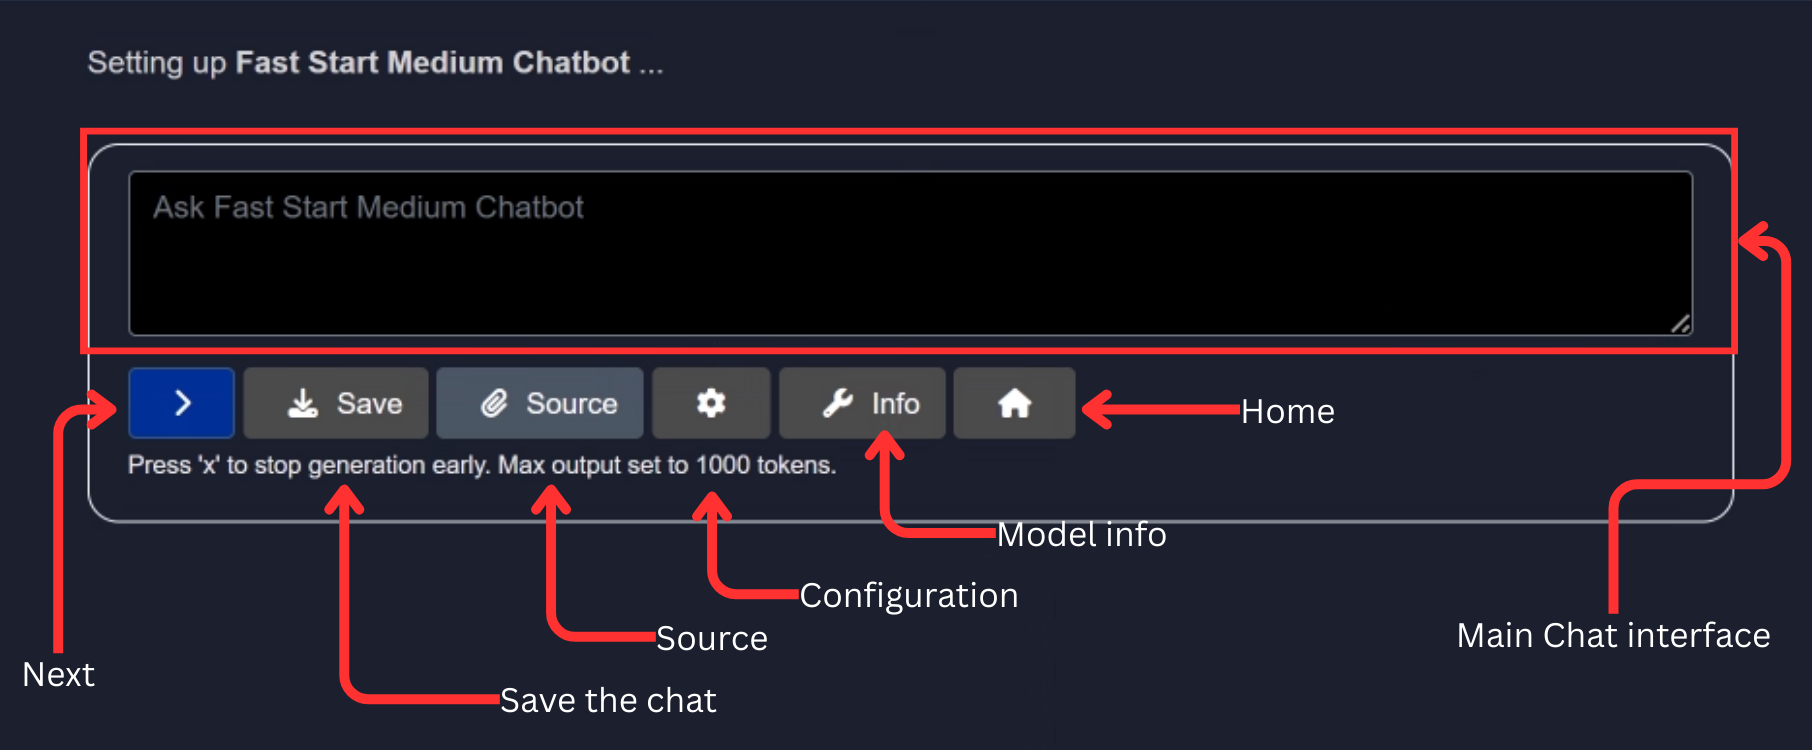
This interface offers several powerful tools to interact with your model. We will explore each feature one by one:
- Info Button
- Configuration Button
- Source Button
- Save Button
But before diving into these features, let us quickly try interacting with the chatbot using some demo questions — without enabling RAG (Retrieval Augmented Generation).
For instance, we asked the model, What is the most famous equation given by Euclid? and clicked on the > button. Check the result below:
Feel free to experiment on your own — this is a basic chatbot setup. We will enable RAG functionality in the upcoming sections.
NOTE
For this documentation, we are using the Medium Model. Previously, we demonstrated features using the Small Model. You can switch between models as needed.
Refer to: Changing Chat Model in Model HQ
Info Button
The Info button displays the current configuration settings for your chat model.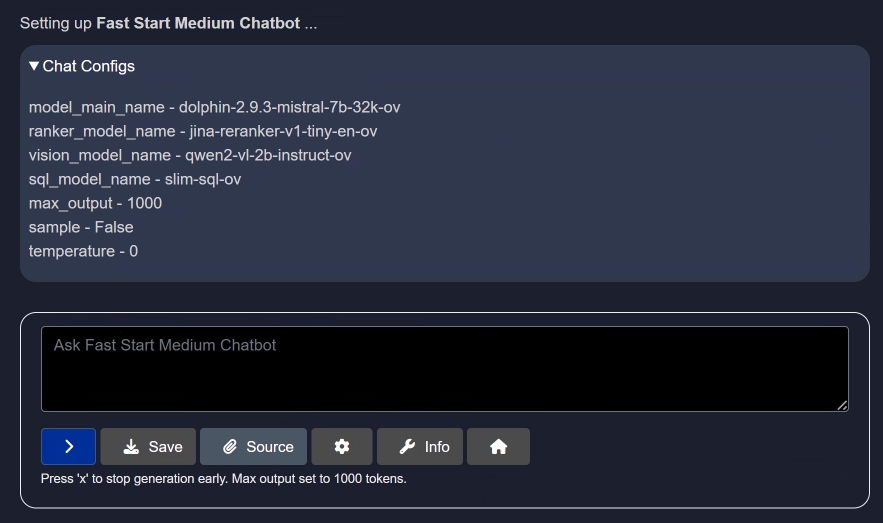
This provides clarity on which model is in use and the configuration parameters currently applied.
Configuration Button
The Configuration button allows you to adjust the model settings for both RAG and generation.
Here, you can customize parameters such as:
- Number of top text chunks
- Target token size
- Maximum output size
- Temperature
- Sampling settings
For example, the temperature setting controls the randomness of the model's output.
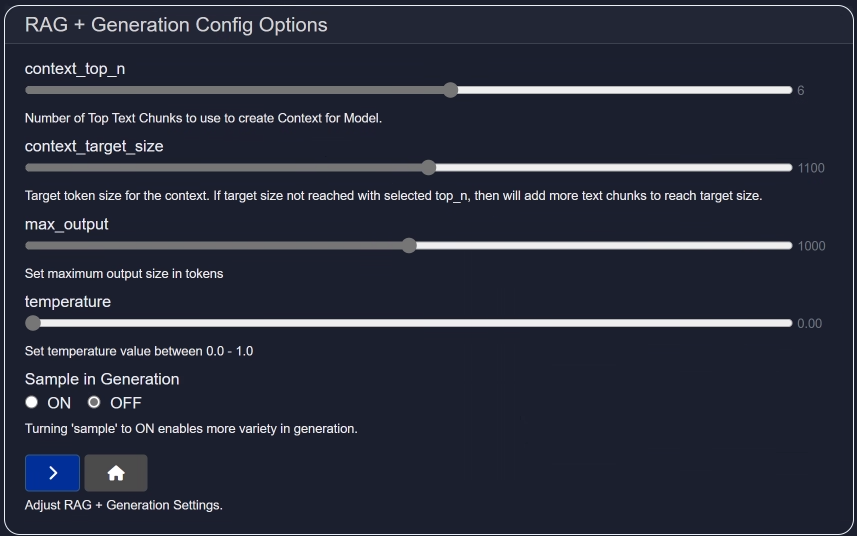
Once you have modified the configuration, click > to save your changes. You can click the Info button again to verify your updates.
To see this in action, we asked, "What is an Apple?" using the same model but with different configuration settings.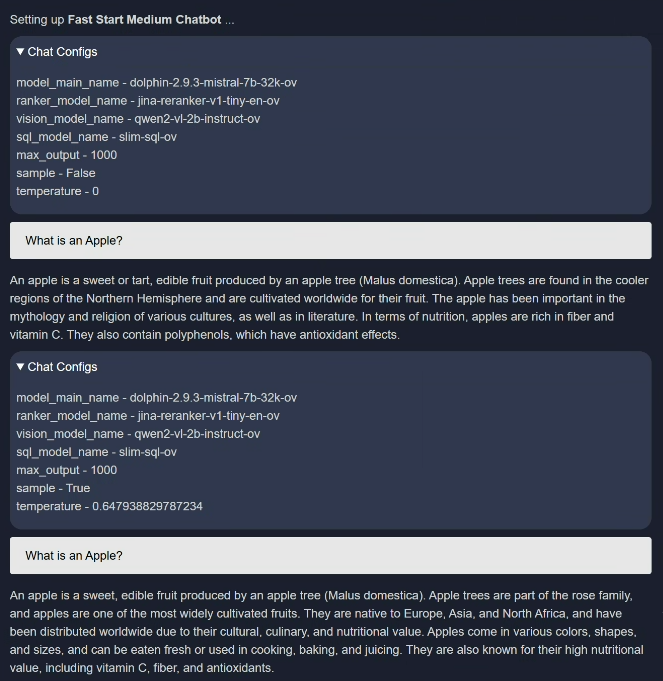
Source Button (Enabling RAG / Chatting with Documents)
The Source button enables you to load external documents or use Wikipedia to enhance your model's responses.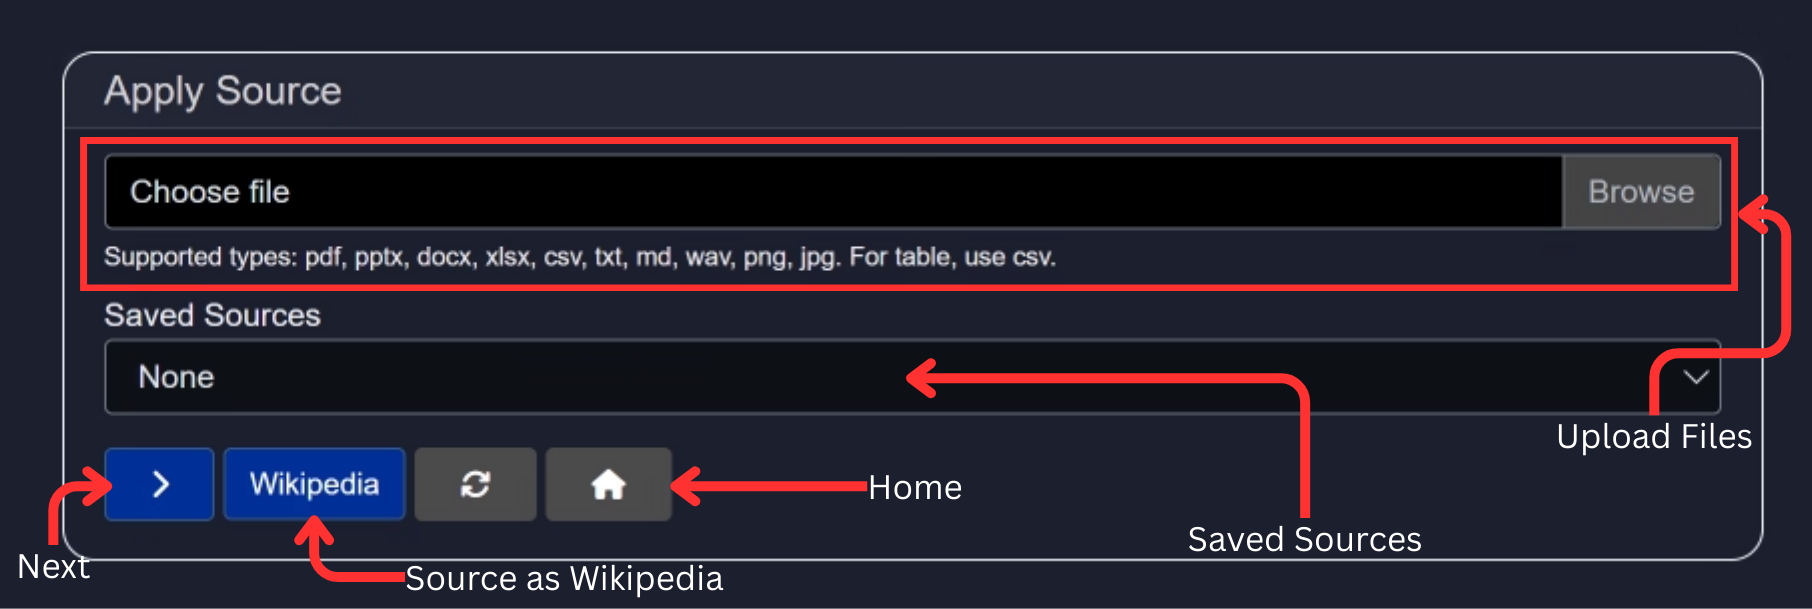
You have several options here:
1. Upload a File
Upload a document and chat within its context. Supported file formats include:
.pdf, .pptx, .docx, .xlsx, .csv, .txt, .md, .wav, .png, .jpg
Currently, the model is able to accept up to ~5 documents at once (depending on file size) for most file types, but cannot accept more than 1 .png, .jpg or .wav file at a time.
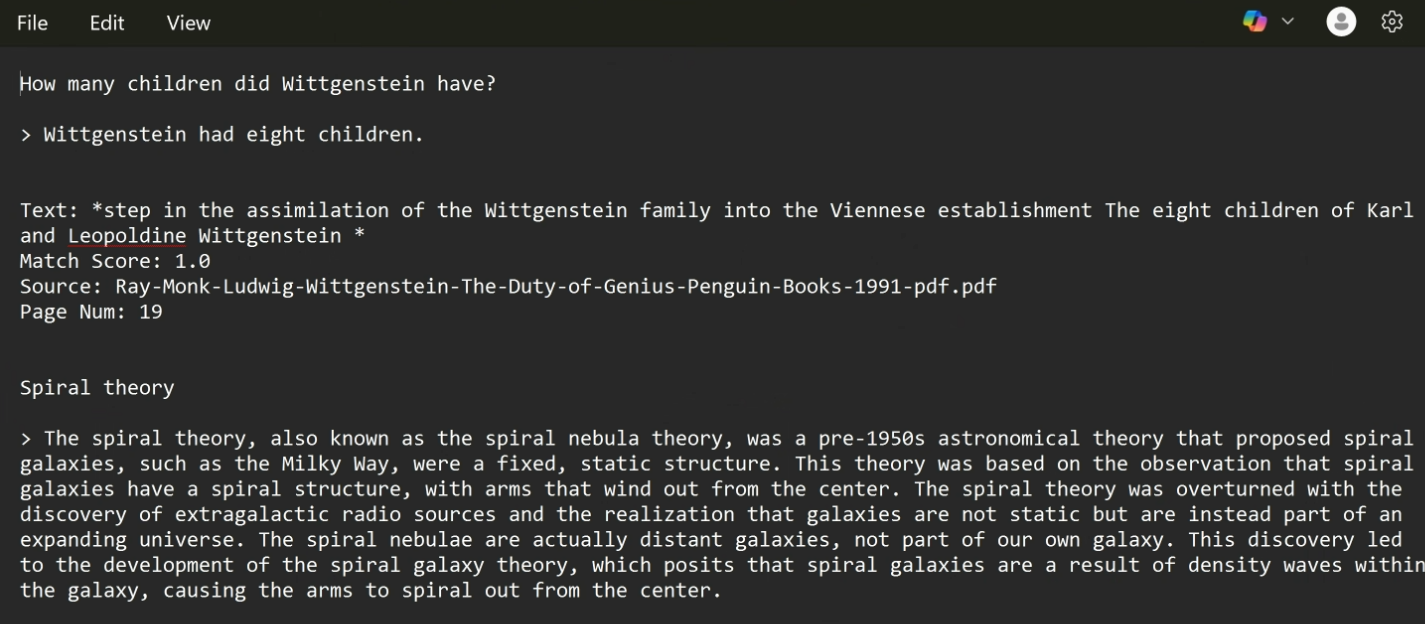
For demonstration, we used a ~800-page PDF: "Ray Monk - Ludwig Wittgenstein: The Duty of Genius (1991)".
We asked, "How many children did Wittgenstein have?" and received an great response — with references and match score.
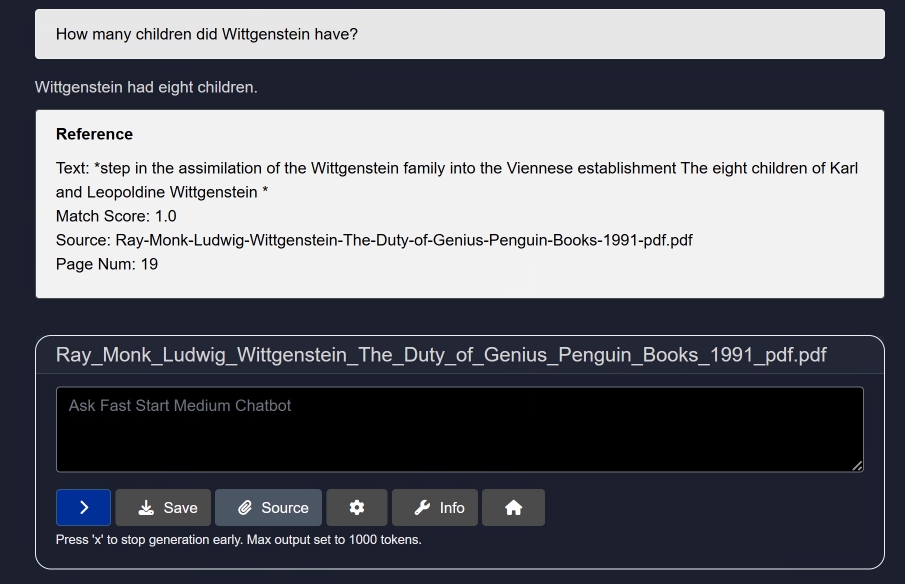
Try it yourself and share your feedback at: support@aibloks.com
(Model used: Dolphin)
To remove the current source, simply click the Source button again.
Reopening the Source interface now shows an additional section: Loaded Sources. These remain available during the current Model HQ session.
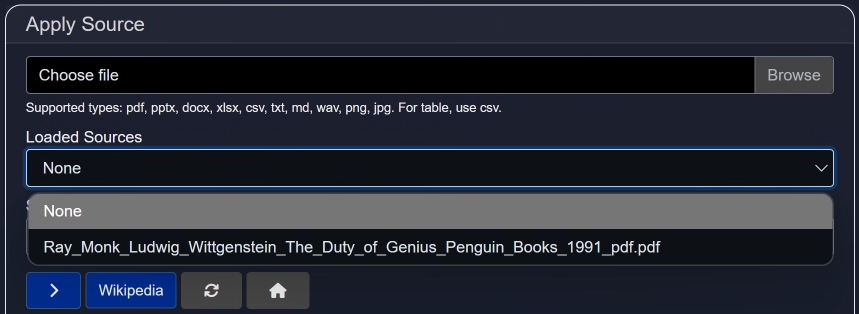
2. Saved Sources
This option lets you access previously uploaded files from your local storage.
Note: Files are not stored on any external server.
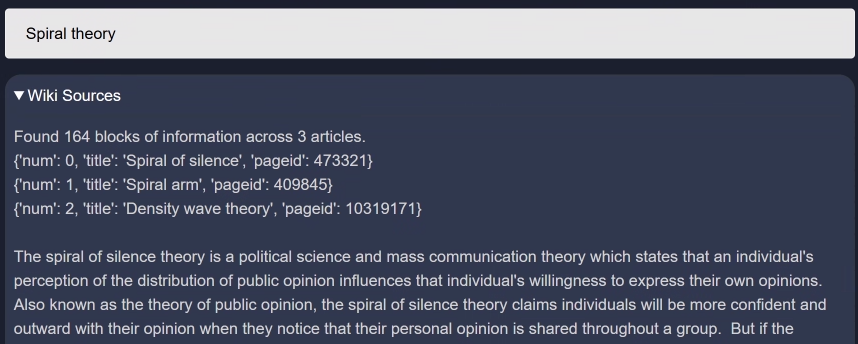
3. Wikipedia as a Source
Select Wikipedia as a source for more factually accurate and up-to-date responses.
For example, we asked about the Spiral Theory. The chatbot responded with an in-depth answer along with source references.
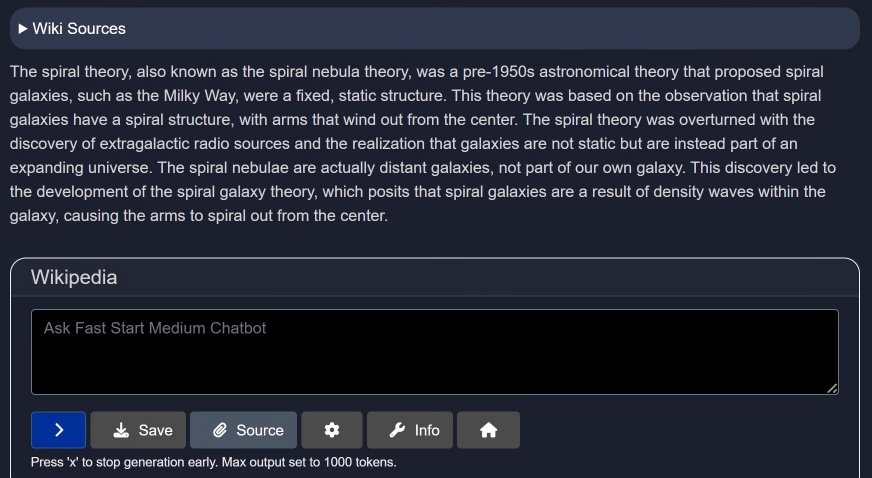
To stop using Wikipedia, click the Source button again.
Save Button
The Save button lets you export your chat session as a .md (Markdown) file.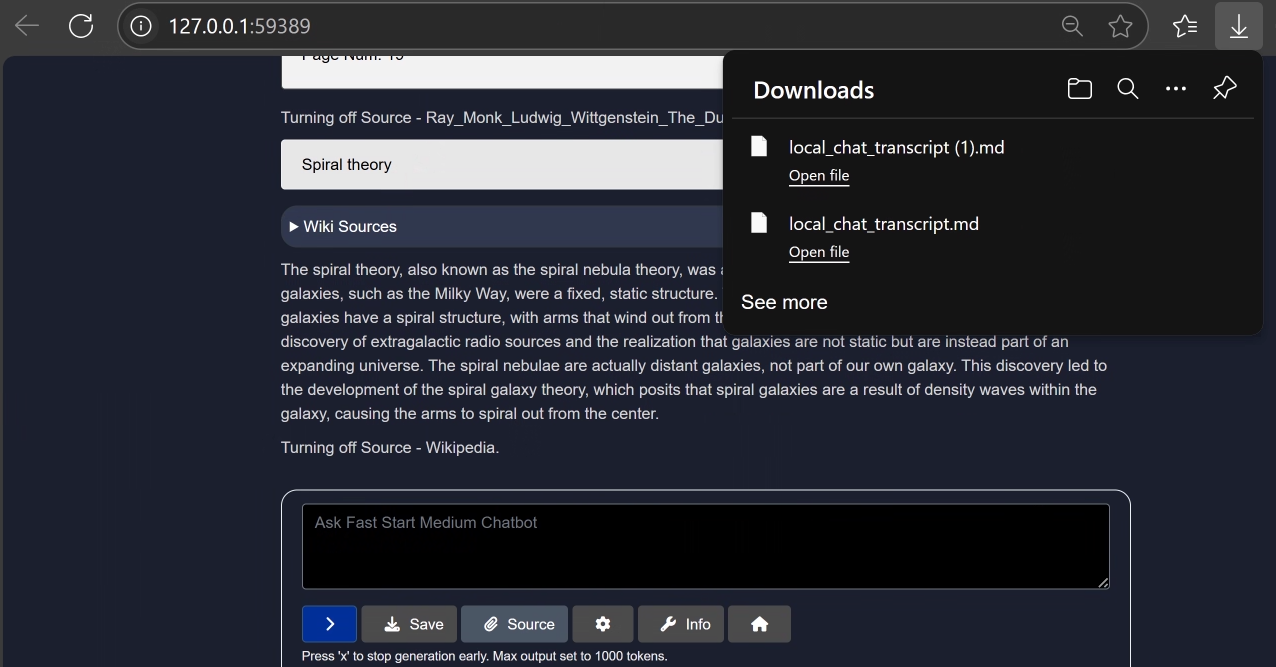
You can open this file with any text editor. Markdown-supporting editors will show it with proper formatting; others will display plain text. Below image shows the exported chat in a text editor i.e. as a plain text.
Conclusion
In this section, we explored the Chat Interface in Model HQ — from basic interactions to configuring the model and using RAG with external sources.
To change the chat model, refer to the guide:Changing Chat Model in Model HQ
For further assistance or to share feedback, please contact us at support@aibloks.com